
 It seems that oreo truffle pops, cake pops, and chocolate covered marshmallows seem to be a very popular thing right now when throwing a party. And they totally should be. I say when throwing a party the more treats there are, the better the party is! I Love throwing parties so I thought it would be good to make a dessert stand to display all of my wonderful creations on!

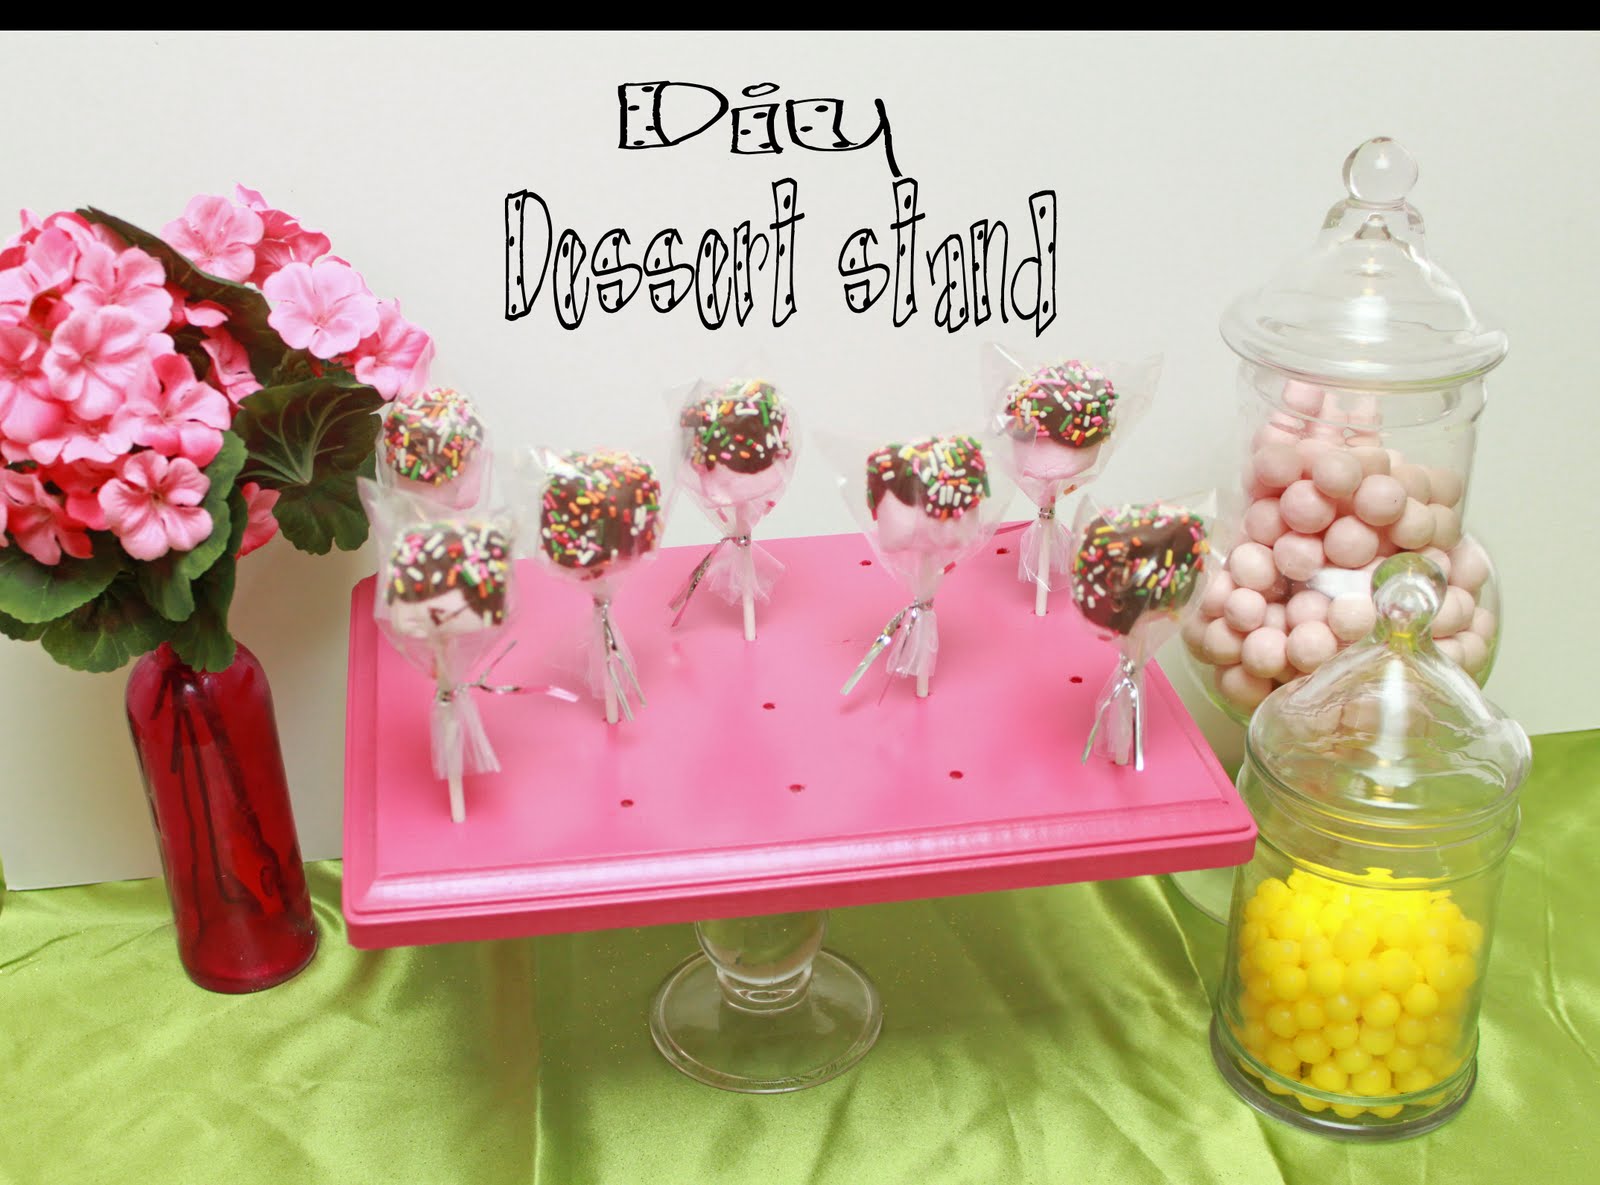
- wooden plaque (I got mine at hobby lobby for 2.99. 30% off of course)
- measuring tape
- pencil
- drill with bit
- spray paint
- candle stick (optional)
- E-6000 (optional)
 First you are going to decide how many holes you want in your dessert stand. I did mine 4x5. I made my husband figure out where is hole would go and he marked it all up. Make sure you don't mark too hard so that you don't get any indentations in your wood. Also mark light with a pencil so your markings don't show up after you have painted.
 Next get your drill out and pointing your drill straight down drill a hole where each of your marks made an x.

 Once your holes are all drilled take some sandpaper and rub it over the top to get rid of any rough spots left over from drilling. Soft wood like pine tends to do this. Once its all smooth paint it with spray paint of acrylic paint. Add at least 2 coats and let it dry for a good 24 hours. When you are all done fill it up with what ever mouthwatering treat you made.
 You can always just have it lay flat on your table or you can get a little fancy and glue a candle stick to the bottom of the board using the technique used here.

The best thing is, once your party is all over you can always repaint the dessert stand to match the colors of your next party. Don't you just LOVE paint?! I know I sure do. Be creative when making these. You can always paint polka dots or stripes. Maybe even stencil something cute on top or even cover with paper and mod podge. The possibilities are endless. Make it to fit YOUR style.
This is ADORABLE!!! I love it!!! I had to put my bagged cake pops in a bowl, and while that was okay, I was always wishing I could think of a DIY way of making a holder. I think this is perfect!! :)
ReplyDeleteThought this was so smart--featuring it on my blog today--hope you don't mind (with credit and link to you of course)!!
ReplyDeleteRM, Home Confetti
http://homeconfetti.blogspot.com
What size board did you use? How far a part were each hole?
ReplyDeleteThanks
Russ (rlee@uwf.edu)
nice job!! Very well done.
ReplyDeleteWe have a link-up party going on - Tea Time Thursdays @ Kreative Korner. I would really appreciate if you'd link up some of your awesome posts there. Hope to see you at the party.
http://tanyaanurag.blogspot.com/2011/08/tea-time-thursdays-2-and-features.html